最近将公众号的文章进行了整理,用vuepress搭建了一个在线文档版的文章笔记,整体来说vuepress在线文档不管pc端还是移动端阅读体验是相当可以,我的在线文档是vuepress2.0搭的(vuepress2.0是vite构建),无论本地打包还是本地服务是相当的快,从vuepress1.0到2.0升级过程遇到的一些问题,做了一些记录。
正文开始...
vuepress1.x
- 默认首页有左侧菜单栏
当我们设置一个默认自定义首页,然后开启左侧菜单栏时,此时首页也会出现左侧菜单栏
解决办法,主要是sidebar格式配置错误
错误配置
export const sidebar: Array<SidebarItem4Group> = [
  {
    title: 'js',
    collapsable: false,
    sidebarDepth: 3,
    children: [
      {
        title: '基础',
        children: [
          {
            title: '你不知道的循环中断',
            sidebarDepth: 3,
            path: '/front/js/2022-02-18'
          }
        ]
      }
    ]
  },
 ...
];
正确配置
export const sidebar = {
  '/front/js/': [
    {
      title: '基础',
      collapsable: true,
      children: [
        '', // js下的RADEME.md文件
        '2022-02-18'
      ]
    },
    {
      title: '进阶',
      collapsable: true,
      children: ['']
    }
  ]
};
当你设置左侧菜单后,你想让右侧也出现一个内容进度导航,因此你可以设置subSidebar
- subSidebar 二级菜单
// 主题
module.export {
  themeConfig: {
    subSildebar: 'auto' // 或者生成二级菜单
  }
}
但是发现右侧内容导航fixed却始终失效了,一顿排查
- 右侧目录fixed失效问题
由于父级元素设置transfrom:translateY(0)产生堆叠上下文,因此需要重置.page样式
// styles/palette.styl
.page {
  transform: none !important;
}
vuepress中markdown文件引入第三方cdn图片403错误
由于我们vuepress本地服务把当前本站的referrer带给了cdn图片请求,第三方发现不是本站的请求,所以直接403错误
在config.ts中添加meta标签
export default defineConfig({
  ...
  head: [
    [
      'meta',
      {
        name: 'referrer',
        content: 'no-referrer'
      }
    ]
  ],
  ...
});
此图片来自微信公众平台未经允许不可引用

如果图片是微信公众号文章后台上传的,偶现图片显示不出来 需要添加meta
// /docs/.vuepress/configs/head/index.ts
...
 [
    'meta',
    {
      'data-draft-node': 'block',
      'data-draft-type': 'table',
      'data-size': 'normal',
      'data-row-style': 'normal'
    }
  ]
定义全局组件
主要是在.vuepress新建components,内部组件会自动根据文件名注册成全局组件,比如下面两个类似的组件
|---components
      |---glob
            |---text.vue
      |---Hello.vue
在markdown文件中就可以直接使用了
* 这是一个全局注册的组件
<Hello />
<glob-text />
pwa
主要在离线状态下,如果断网了,依然可以正常访问应用 参照官方pwa
// pwa
const { pwaPlugin } = require('@vuepress/plugin-pwa');
export const plugins: any = [
  pwaPlugin({
    skipWaiting: true
  })
];
在public目录下新建一个manifest.webmanifest.json文件
{
  "name": "Web技术学苑",
  "short_name": "Web技术学苑",
  "start_url": "/index.html",
  "display": "standalone",
  "background_color": "#fff",
  "theme_color": "#3eaf7c"
}
并且在header中也需要配置
import type { HeadConfig } from '@vuepress/core';
const head: HeadConfig[] = [
  ['link', { rel: 'icon', href: `/images/n_logo.png` }],
  ['link', { rel: 'manifest', href: '/manifest.webmanifest.json' }],
]
但是注意,只能生产环境才能验证,本地开发环境,貌似始终不生效
webpackConfig修改aligns不能使用path
当我配置文件使用webpack的配置时,使用不了path,非常困惑,无解
const path = require('path');
// console.log(path.resolve(__dirname), 'dirname')
const webpackConfig = {
  configureWebpack: (config, isServer) => {

  },
  chainWebpack: (config, isServer) => {
    // config.resolve.alias
    //   .set('@vuepress', '../../../.vuepress')
    //   .set('@front', '../../../front')
  }
}
export default webpackConfig
npm run build 报错
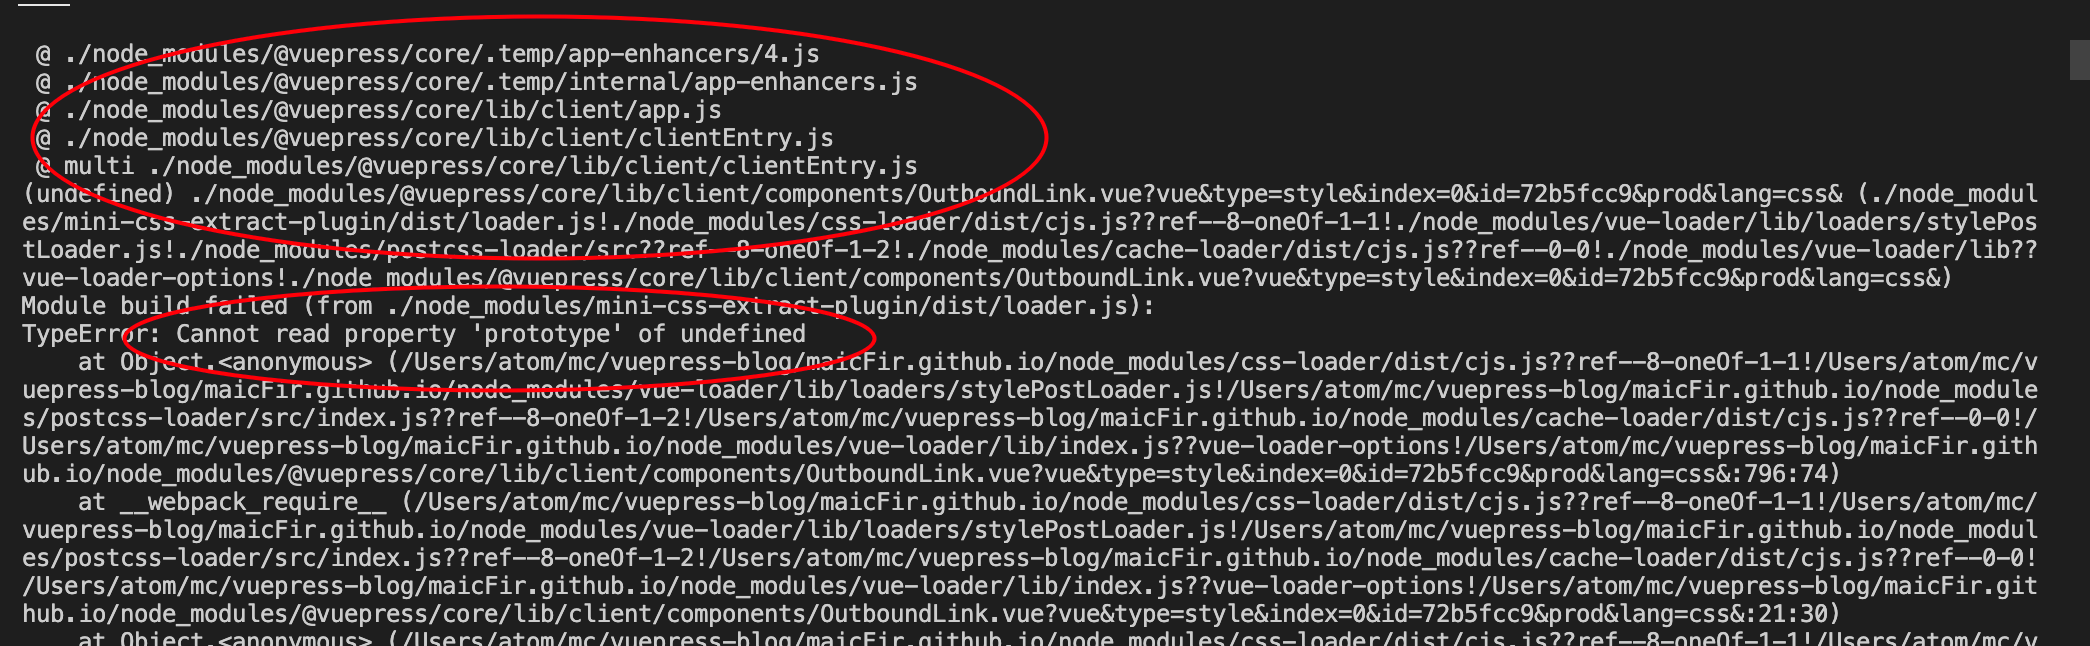 以上错误在vuepress1.0中开发环境正常,但是一打包就报错,降级vuepress版本,删除
node_modules都没有无解决
实在无奈弃坑了
vuePress2.0小试牛刀
vuepress2.0是用vite构建的,本地服务速度与大包速度真的比vuepress1.0要快很多,但是也有坑
打包报报错
因为我是直接从1.0升级到2.0,所用的在md中使用了自定义全局组件,在vuepress1.0中只要是commponents下的组件就会按照文件名自动注册成全局的。
但是vuepress2.0需要你引入插件@vuepress/plugin-register-components才行,否则在md引入的全局组件,大概会报以下错误
TypeError: Invalid value used as weak map key at WeakMap.set
当你未使用@vuepress/plugin-register-components时,你需要把md的文件的组件注释掉,不然打包就会报错
假设你在md上使用的一个未注册的组件,打包就会报错 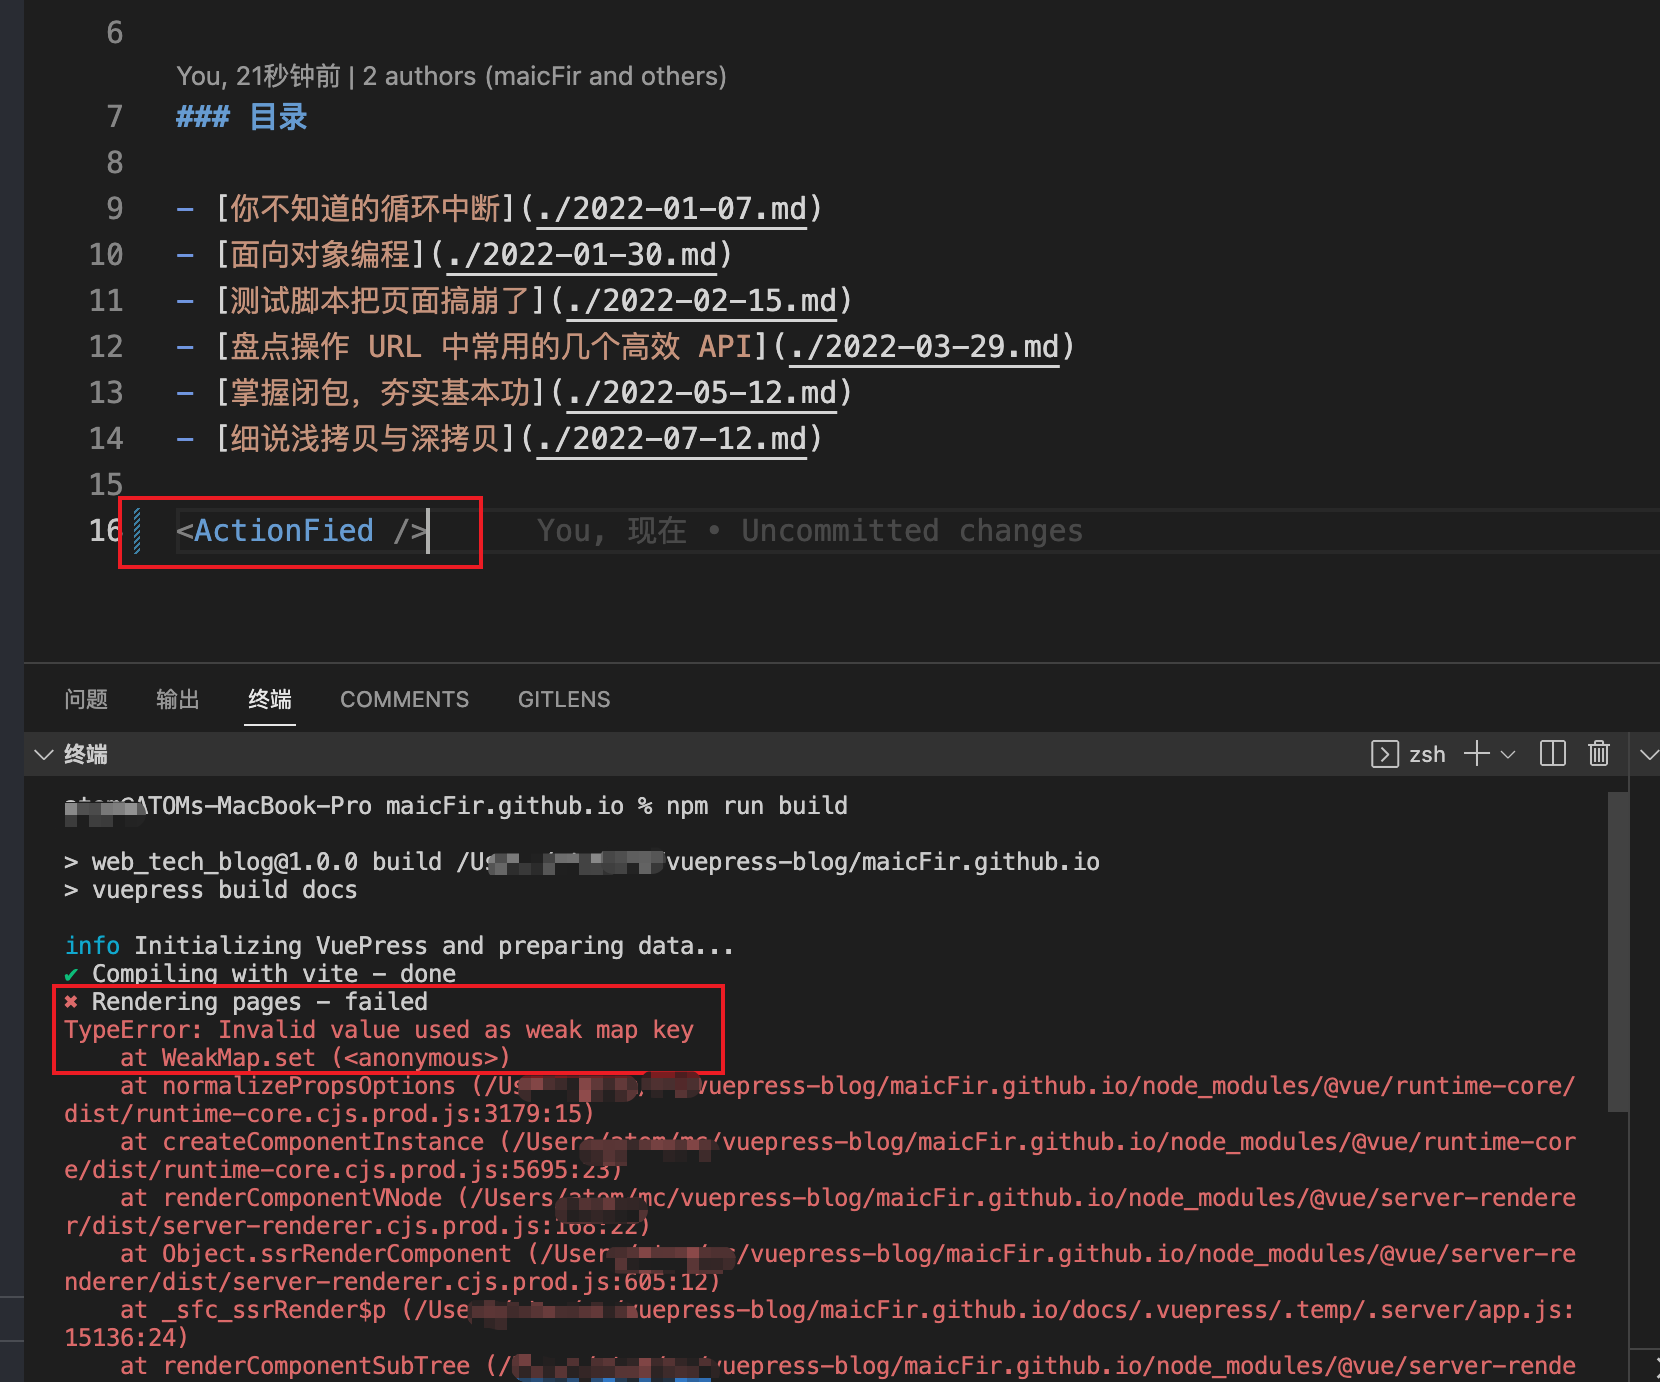
因此要特别注意,自定义的组件在md文件中需要注册才行
添加搜索
vuepress2.0需要引入搜索插件
// plugins/index.ts
const { docsearchPlugin } = require('@vuepress/plugin-docsearch');
export const plugins: any = [
  docsearchPlugin({}),
];
文章编写错误
如果你的文章开头有换行,文章解析会有问题
---
title: 写了个git提交脚本
date: 2022-07-25
sidebarDepth: 3
---
首行不能有换行 
vuepress2.0注册全局组件
在vuepress1.0的components目录下,默认会以文件名注册全局组件,如果是文件夹会是默认以文件夹名+文件名注册组件名
在2.0中,需要引入注册组件插件@vuepress/plugin-register-components
const { registerComponentsPlugin } = require('@vuepress/plugin-register-components');
export const plugins: any = [
  registerComponentsPlugin({
      componentsDir: path.resolve(__dirname, '../../', 'components'), // 自动注册全局组件,
  }),
];
当我们这样设置后,注意在components目录下的xxx.vue组件会被注册成全局组件,参考使用组件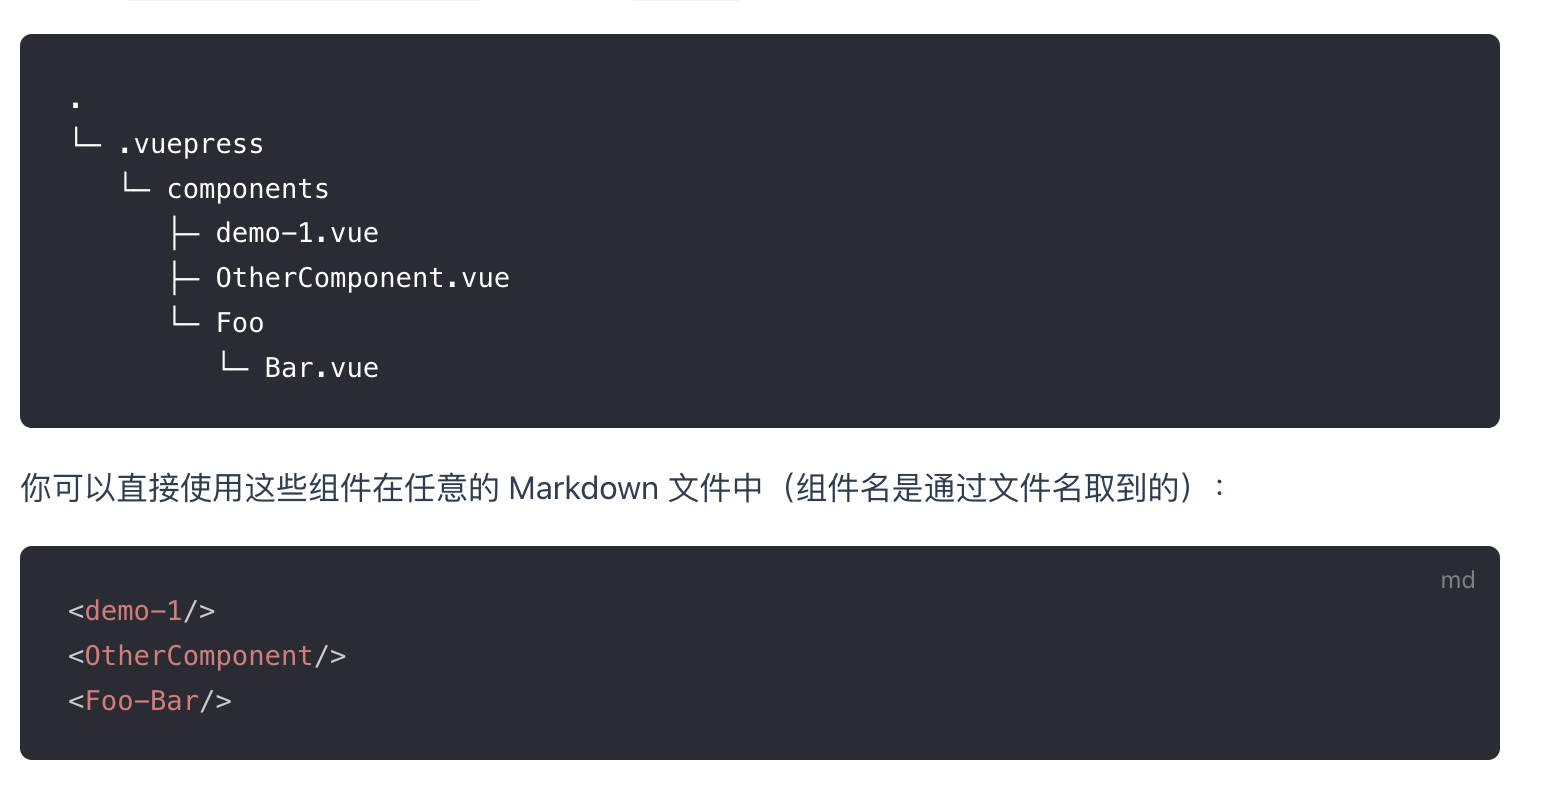
但是官方也提供了一种方案,可以让我们手动注册全局组件,如果你不想局限于官方插件这种约定式的方式
2.0客户端自定义配置
因为你想高度自定义化,所以官方提供了客户端自定义配置,首先需要在.vuepress文件夹下新建一个client.ts
// .vuepress/client.ts
import { defineClientConfig } from '@vuepress/client';
import { installComponent, rootComponentsGlobal } from './components';
export default defineClientConfig({
    enhance({ app, router, siteData }) {
        // 注册自定义全局组件
        installComponent(app);
  },
  setup() {},
  rootComponents: rootComponentsGlobal, // 注册全局组件,放在根节点
})
我们注意到rootComponents,这个实际上就是全局注册在根节点上的组件
我们看下./components这个目录
// 引入自定义注册全局组件
import ActionFied from "./ActionFied";
const Custcomponents = {
    // 自定义的一些组件
}
// 注册全局
export const installComponent = (app) => {
    if (Object.keys(Custcomponents).length > 0) {
        Object.keys(Custcomponents).forEach(key => {
            app.component(key, Custcomponents[key])
        })
    }
}
// 注册到根节点上的全局组件
export const rootComponentsGlobal = [
    ActionFied
]
因此你看到的右侧的这个浮框就是一个全局组件,所有页面都会有这个全局组件 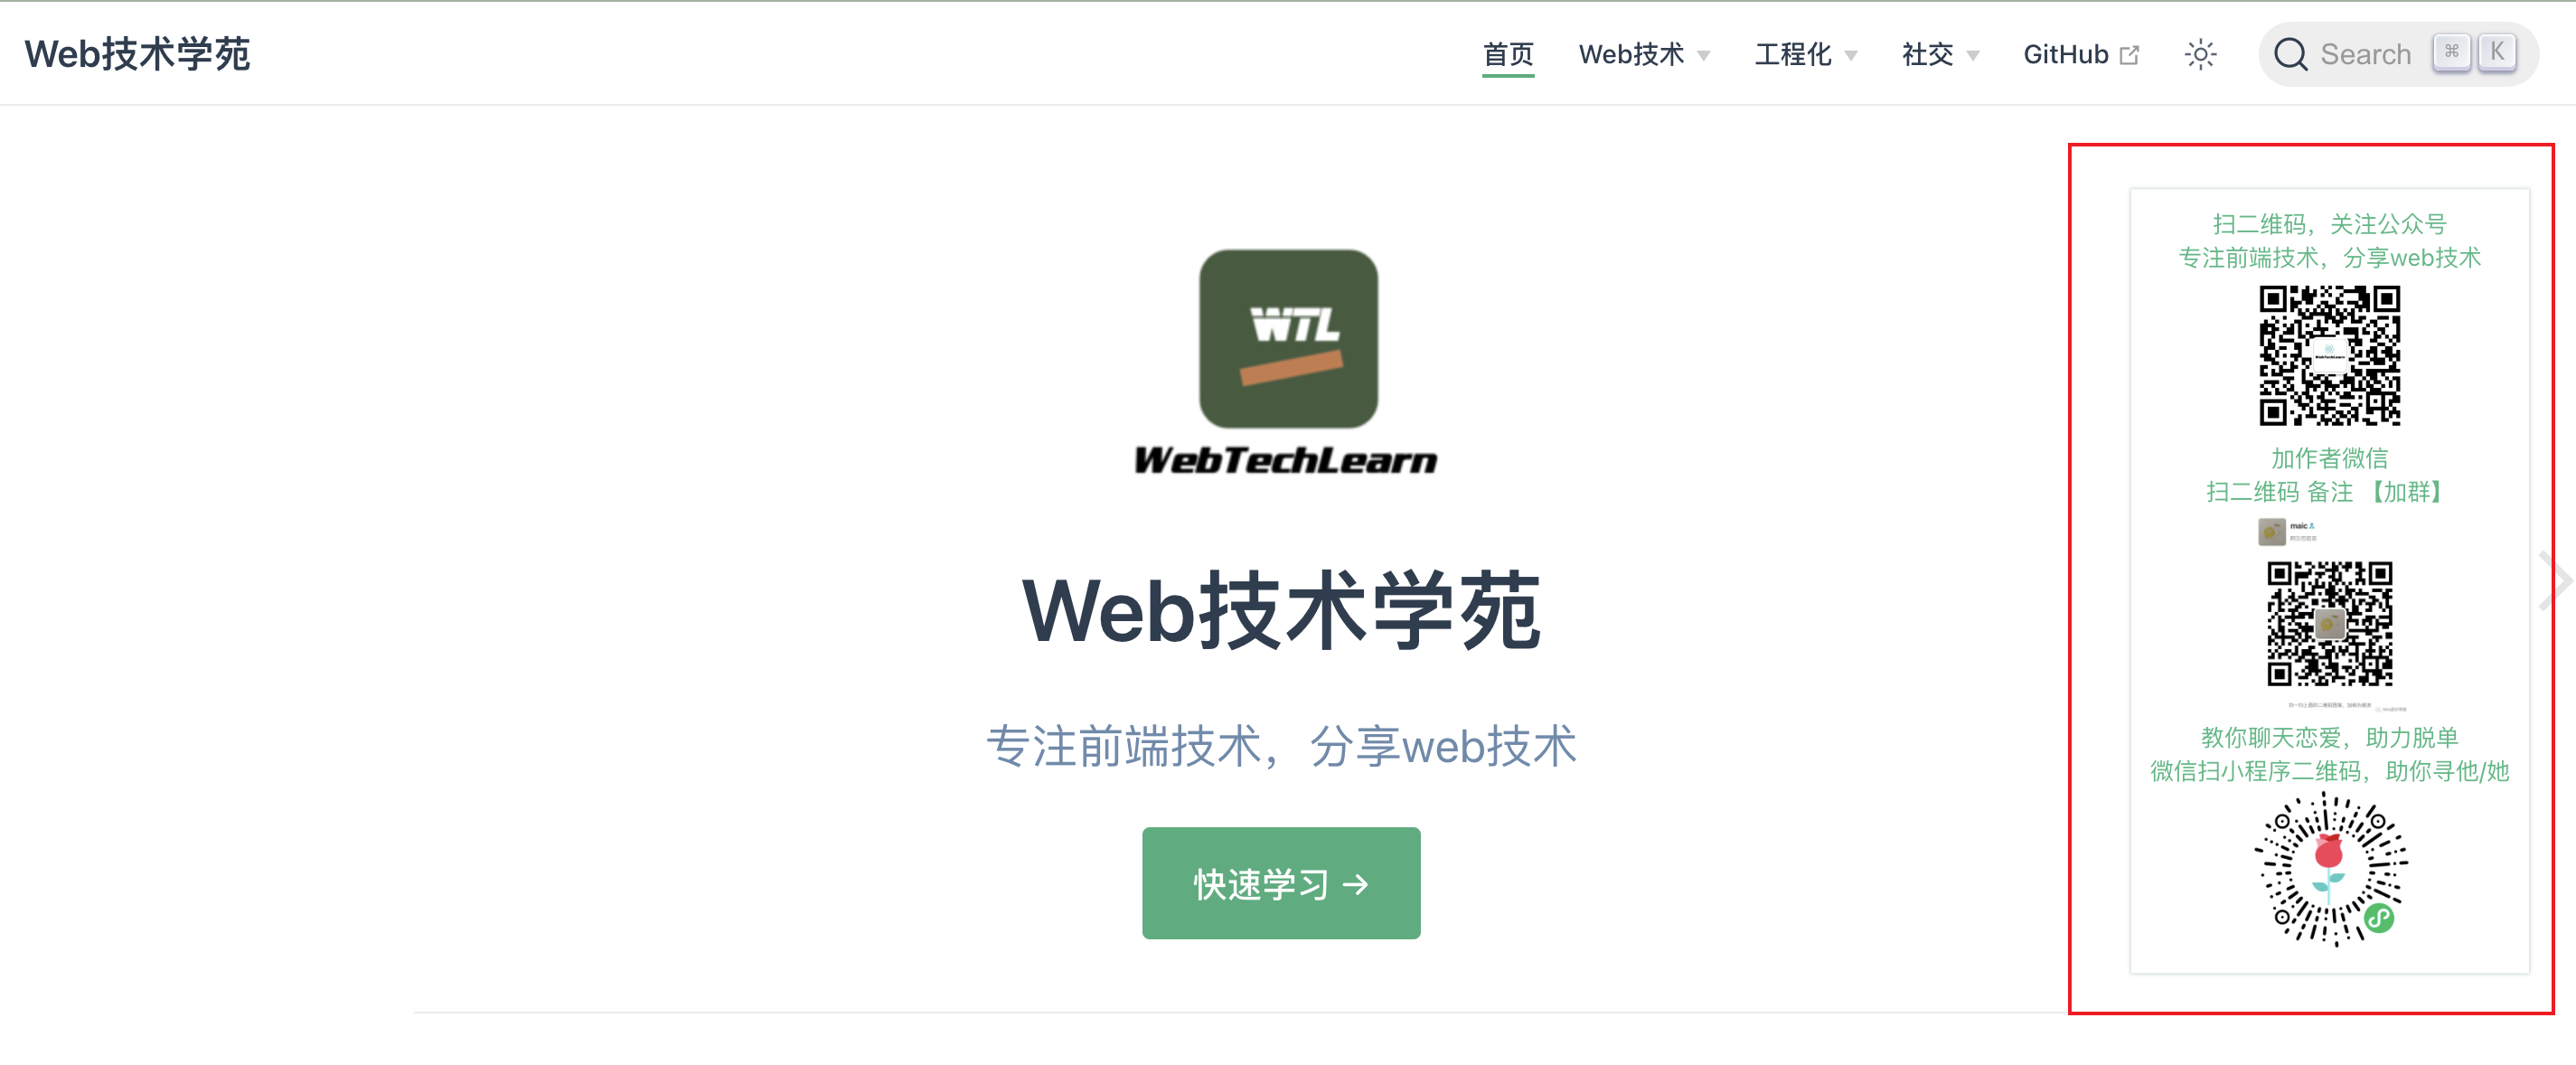
配置alias
比如我们通常项目用到的aligns,因此需要我们自己配置,参看官网vite
// .vuepress/config.ts
import { defineUserConfig } from 'vuepress';
import ViteConfig from './configs/viteConfig';
export default defineUserConfig({
   ...,
    bundler: ViteConfig.bundler
});
在./configs/viteConfig中
// configs/viteConfig/index.ts
import { viteBundler } from '@vuepress/bundler-vite';
import { defineUserConfig } from '@vuepress/cli';
const { path } = require('@vuepress/utils');
export default defineUserConfig({
  bundler: viteBundler({
      viteOptions: {
          resolve: {
              alias: {
                '@component': path.resolve(__dirname, '../../components'),
                '@public': path.resolve(__dirname, '../../public'),
                '@configs': path.resolve(__dirname, '../../configs')
            }
        }
    },
    vuePluginOptions: {},
  }),
})
部署
我是用同一个仓库,两个不同分支来管理,主要写了一个脚本,这样同一个仓库不同分支管理,避免了创建多个仓库的繁琐
#!/usr/bin/env sh
# 确保脚本抛出遇到的错误
set -e

# 生成静态文件
npm run build

# 进入生成的文件夹
cd docs/.vuepress/dist
git init
git add .
git commit -m 'deploy'
# 推送到指定仓库
git remote add origin https://github.com/maicFir/maicFir.github.io.git

git push -f origin master

echo 'push success'
当你打包成dist文件时,你只需要将推送对应的分支即可
注意当你使用gitPage搭建你的博客时,根目录必须有index.html,不然访问就会是404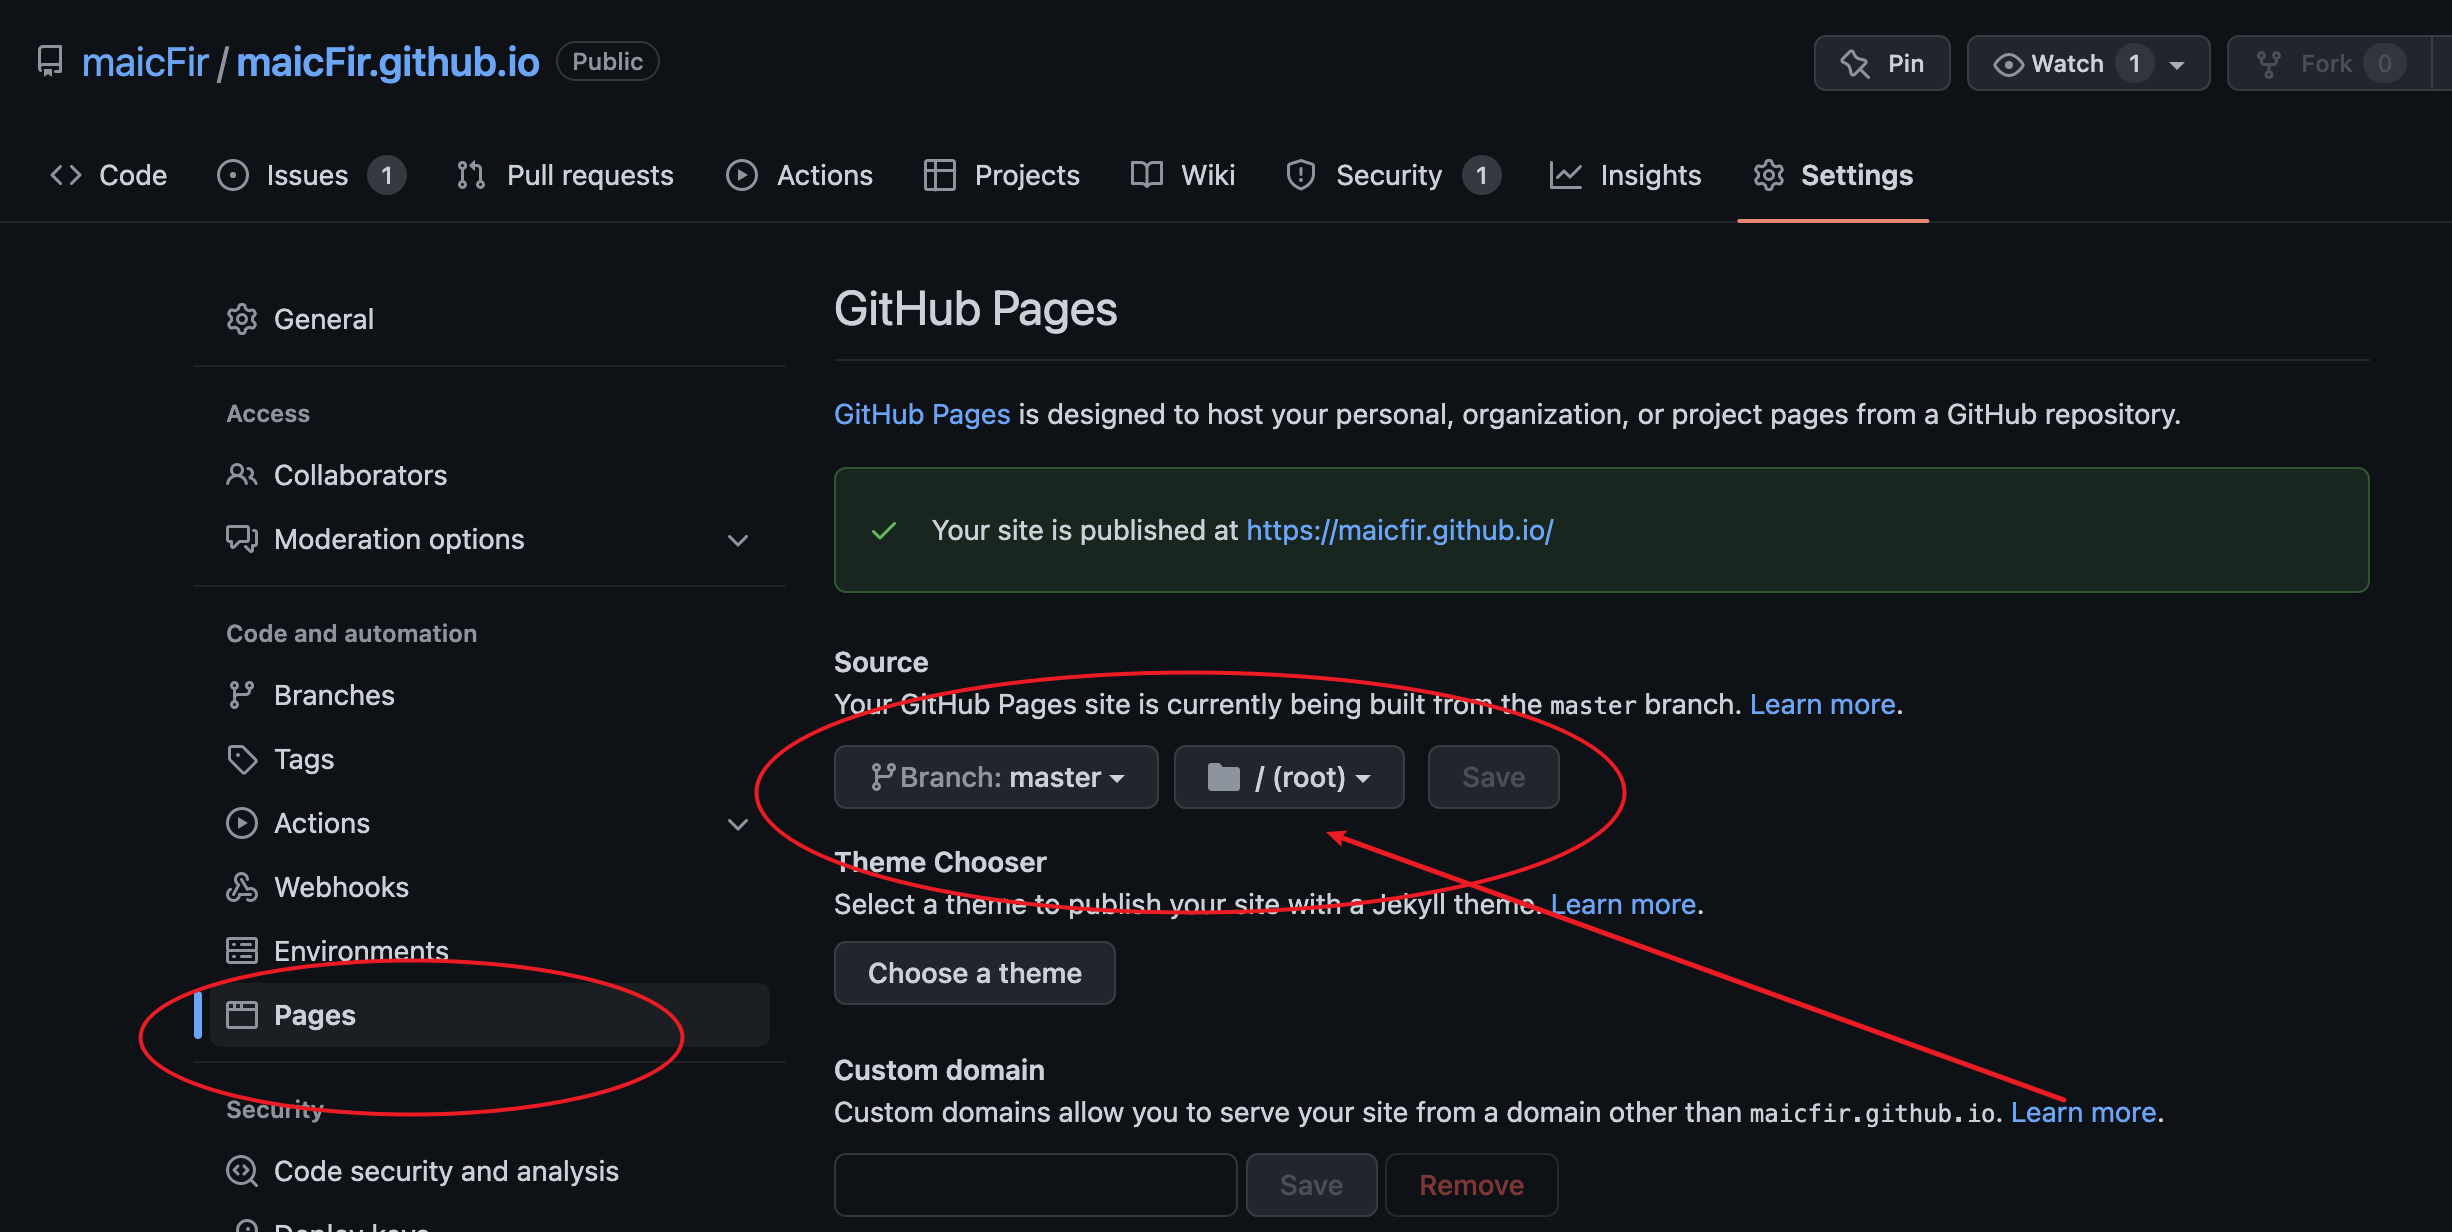
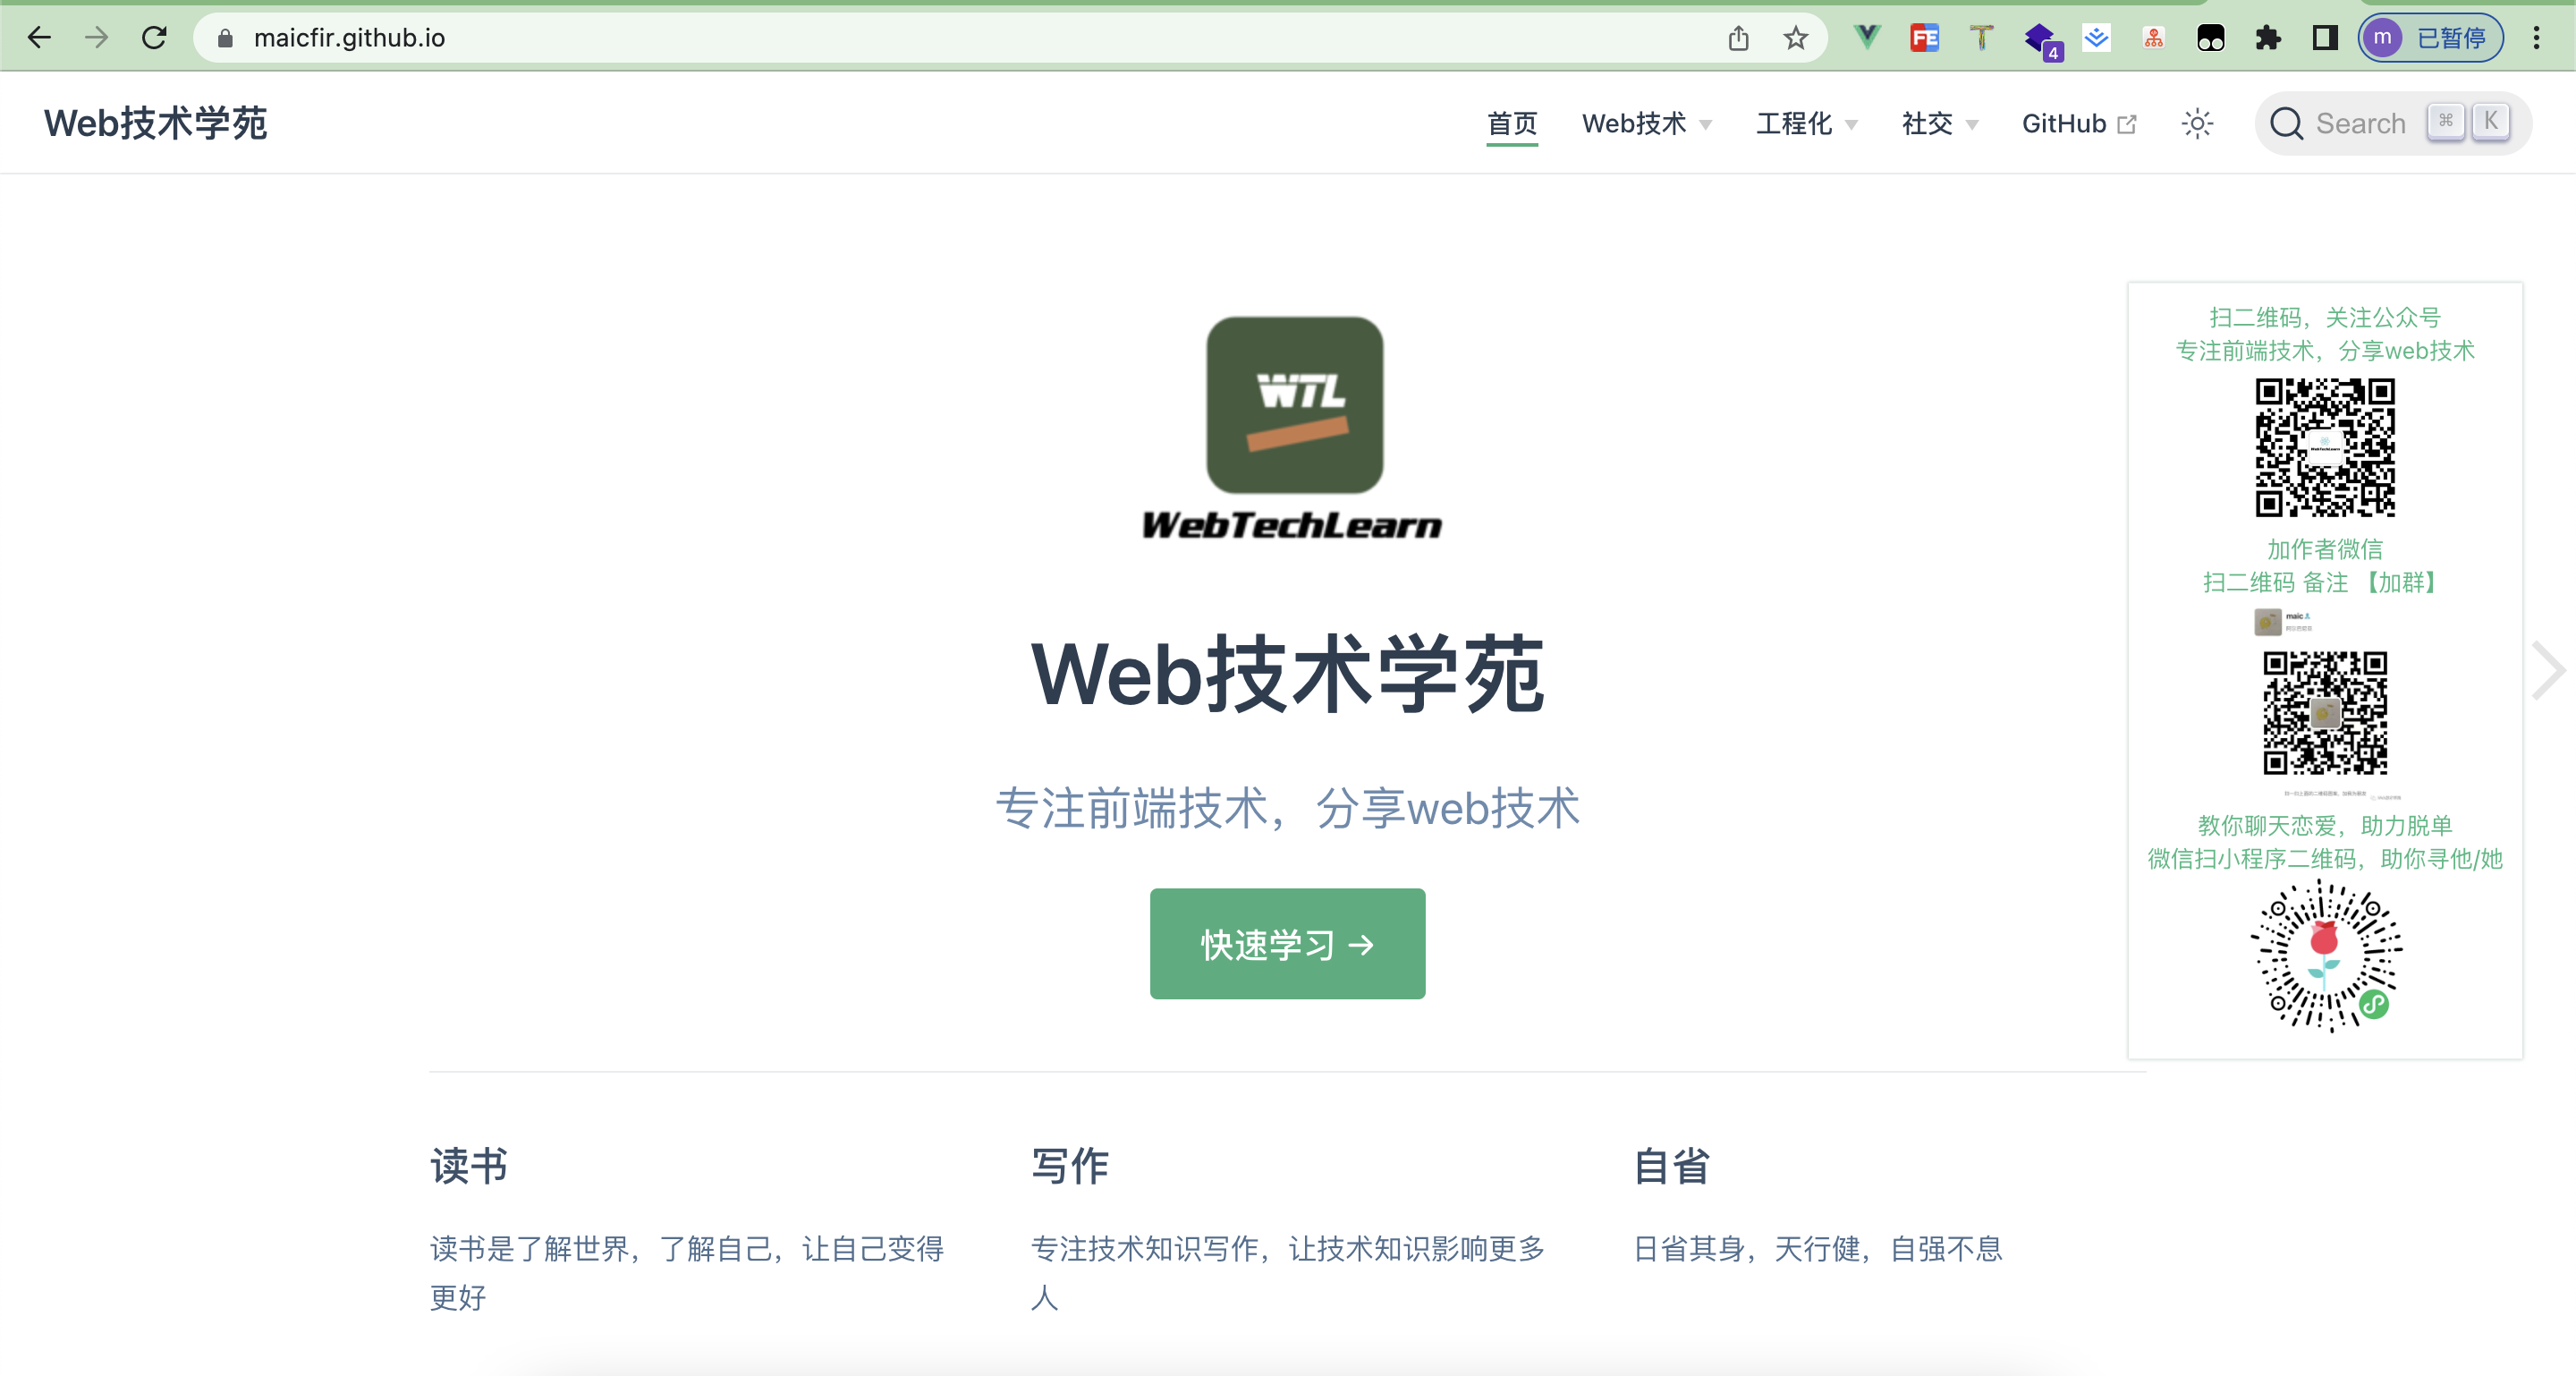
选择对应的提交分支,然后点击保存,等几分钟后就可以访问,然后打开你的gitPage地址,比如我的在线文档地址就是https://maicfir.github.io/
另外vuepress搭建博客文章网上也比较多,可以参考vuepress2.0官网以及mqyqingfeng blog以及vuepress-build-blog
宝塔部署https
首先登陆自己的服务器
ssh -p 80 useName@12.xx.xx
输入自己的密码,然后就登陆进去了
然后在自己服务器安装宝塔软件,参考官网安装宝塔面板
然后官网注册并实名认证,这是为了配置ssl的基础信息
当安装宝塔成功后,输入命令bt default,终端就会显示你在浏览器输入的地址,打开地址,输入用户名与密码登陆即可
bt default
我登陆后就是下面这样 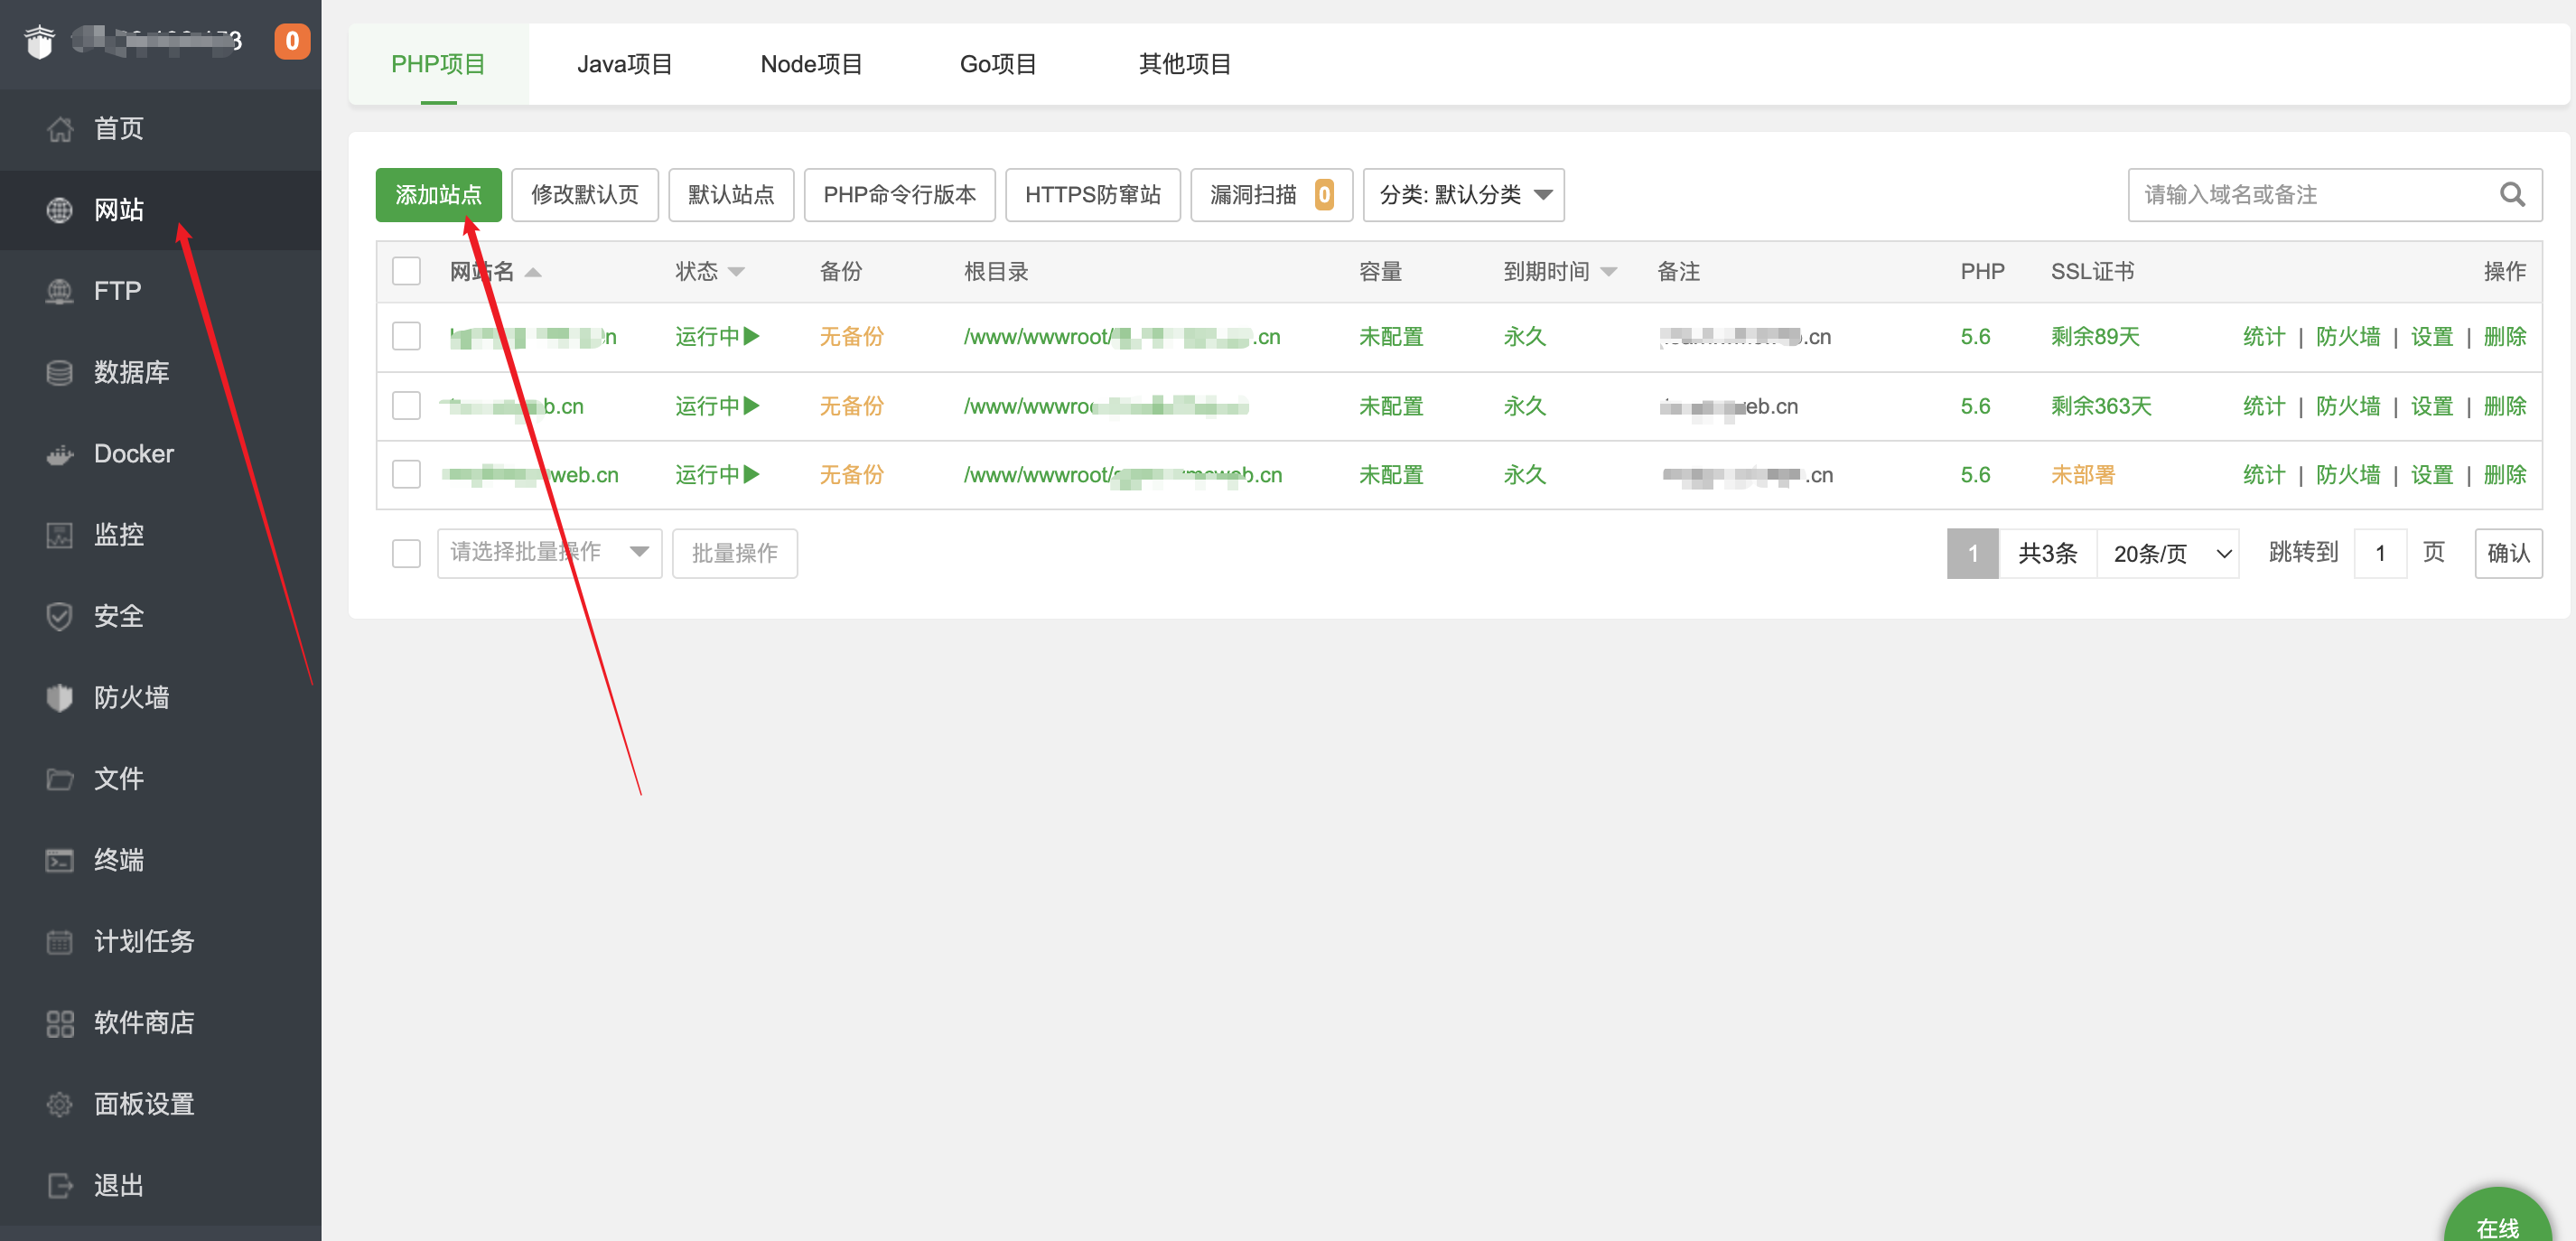 点击网站,添加站点,比如我的站点就是
learn.wmcweb.cn,注意我的主域是wmcweb.cn,而我是添加了一个子域名去访问我的网站的,这个子域名需要你添加域名解析,需要在你的域名解析里面设置 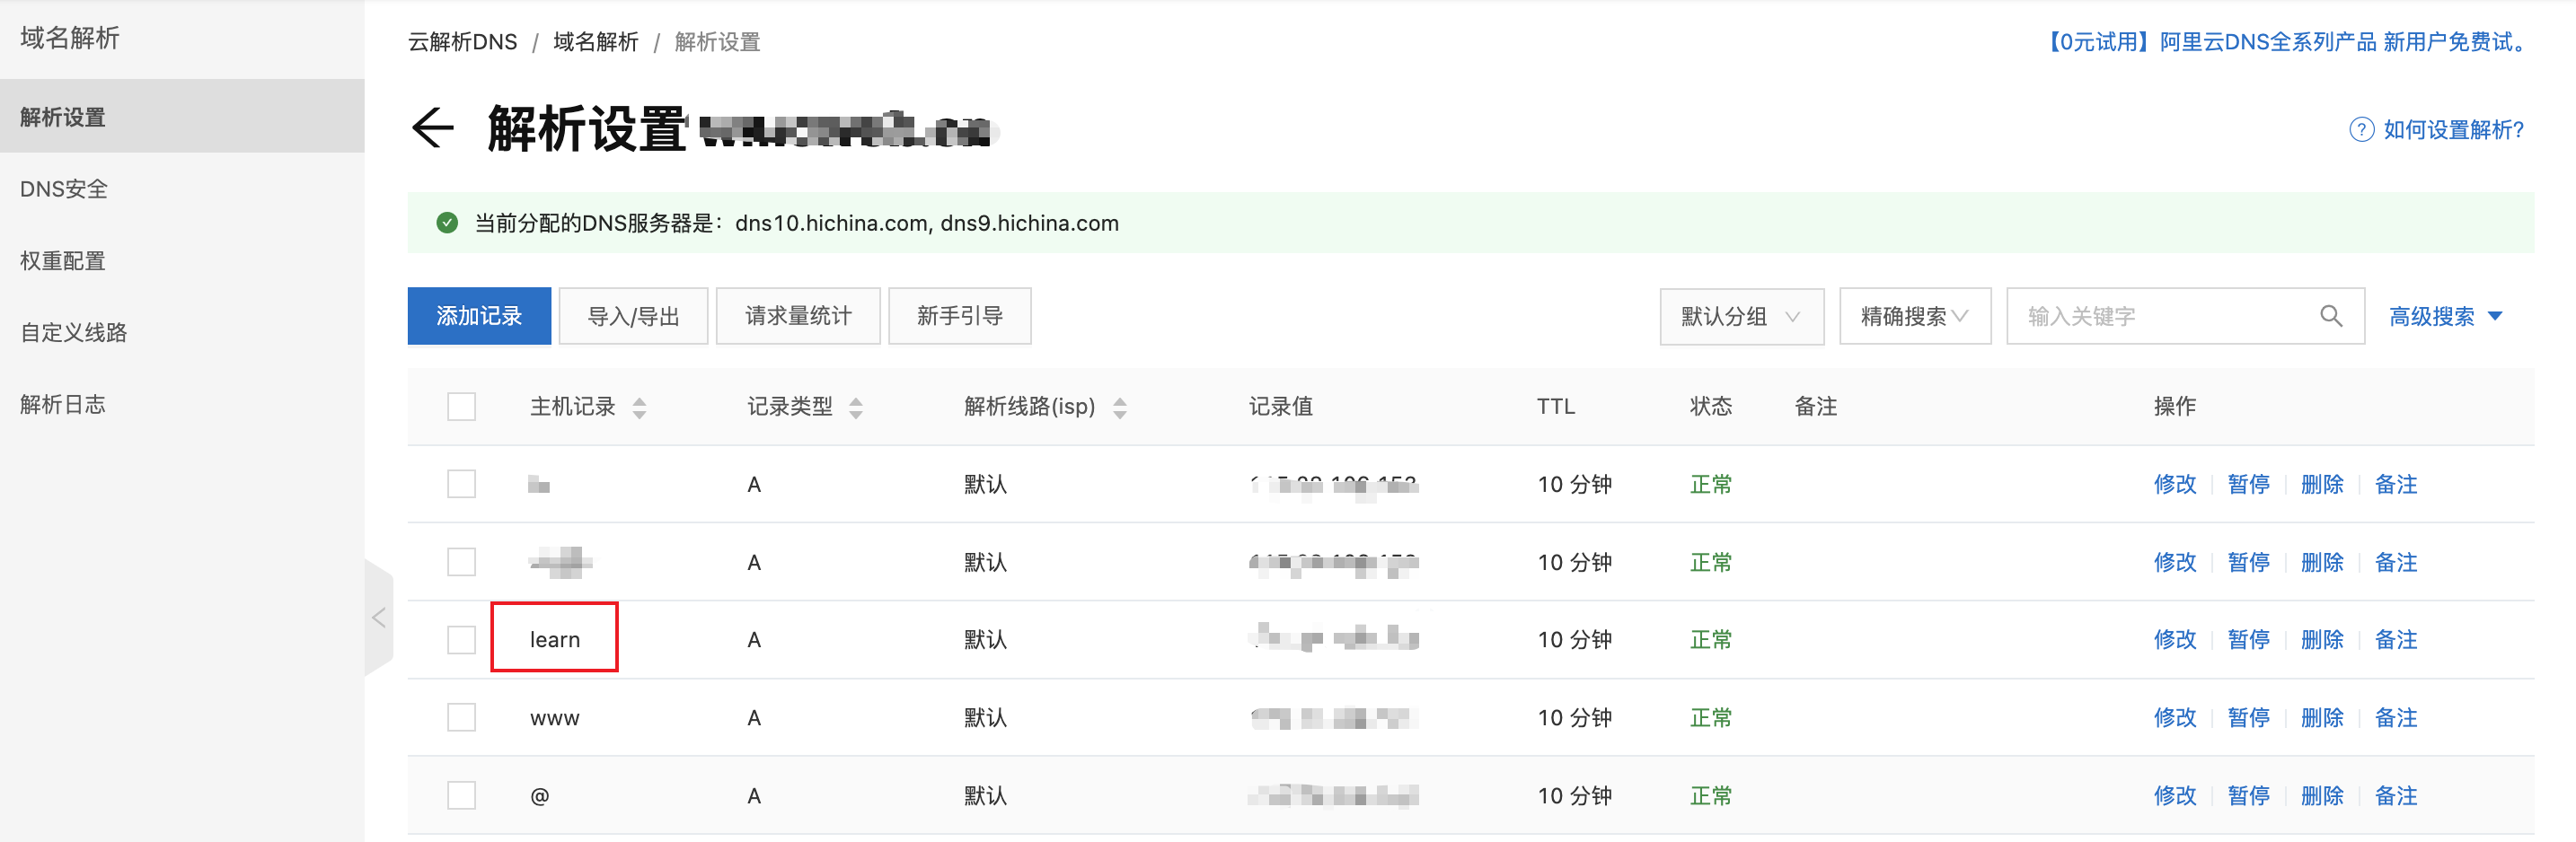
当我们添加一个站点成功后,然后设置ssl  注意,我们点击
宝塔SSL,这样生成的证书时间比较长,到时我们如果到期了,重新替换证书就行。
当你添加ssl后,然后把你本地打包后的dist目录文件上传到你新建的网站目录下就行,然后你就可以愉快的让你的网站支持https访问了。
在线文档
最后关于公众号文章的在线文档就可以愉快的访问了,具体可以访问https://learn.wmcweb.cn/或者https://maicfir.github.io/,文档在线源码参考底部code example
总结
- 主要是使用vuepress1.0与2.0遇到的一些问题
- 第三方图片访问不显示问题以及微信公众平台未经允许不可引用问题
- vuepress2.0打包报错问题,未注册的组件不能在
md文件中使用 - 关于部署
gitPage404问题,当前部署分支必须是打包后的dist文件 - 自动化命令部署
gitPage - 宝塔软件支持网站
https - 本文文档源码地址code example